Fairfield Inn, Scott’s Hot Tamales, and Jim’s Cafe, Greenville MS

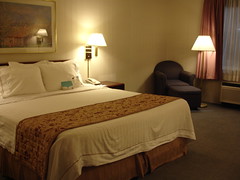
Av and I had a black-tie event to attend in Greenville, and we stayed at the Fairfield Inn again. The Holiday Inn Express is open now, but it was about $20 more expensive and usually HIX aren’t $20 nicer than this particular Fairfield Inn, so that’s where we stayed.

Fairfield Inn, Greenville MS

The event was really nice and we had a good time…since supper was part of the event, we didn’t eat at Doe’s like we usually do (although I’ve been wanting to go to Shapley’s for a while too) – but since we had skipped lunch, we dropped by Scott’s Hot Tamales for a little appetizer. Yum!

Scott's Hot Tamales, Greenville MS

Tamales, Scott's Hot Tamales, Greenville MS

Tamales, Scott's Hot Tamales, Greenville MS

Tamales, Scott's Hot Tamales, Greenville MS

The next morning we got up and had breakfast at Jim’s Cafe. Jim’s Cafe is one of those time-warp places that still exists, where where old men are gathered at one table talking about crooked politicians, what was in the paper this morning, how the world is going to pot, etc. and continually joshing each other in a really funny way. Av got introduced to all of them because one of our friends from there walked in. It was really a blast.

Jim's Cafe, Greenville MS

BTW, they serve some yummy pink lemonade there…mayhaw jelly, too.

Pink Lemonade, Jim's Cafe, Greenville MS

Ma’Cille’s Museum of Miscellanea – and the Art Goes On

There was a little museum in Gordo, Alabama that housed the years and years of ‘findings’ of Mama Lucille (Ma’Cille) House – from buttons to dolls to taxidermy to interesting…stuff – until 1998 when it was auctioned off. The house Ma’Cille lived in, which was the museum (people would visit from all over), is gone now.

There’s a gallery in town with the artwork of her son Glenn House, Sr. – who designed the Moon Winx sign, Kathleen Fetters – who’s Glenn’s wife and does these beautifully painted-over photographs, and Barbara Lee Black – who took some amazing pictures of Ma’Cille’s Museum of Miscellanea before it was gone…and besides her Ilforchrome photographs, she makes beautifully elaborate frames.

Their gallery is at 121 North Main Street in Gordo, in an old NAPA parts shop. I contacted Barbara Lee Black, and she said the gallery is open from 2-6pm *most* Fridays, but to call and make sure they’d be open before driving out (800.718.5893).

Felt Heart Doorhanger

This is the felt doorhanger I made – I just made two similar-size (but not *exactly*) hearts cut from felt – pink and white. I made them just slightly different so when they were sewn together, one would ‘peek out’ from behind.

Some pretty pastel beads went on one side by poking jewelry string through the first layer – and on the other side I stitched in a smaller contrasting-color heart. Inside I put a little cottony stuffing, and finished sewing it together, adding a ribbon to hang the heart by. The whole thing took about thirty minutes!

Valentine's Day Decoration: Felt Heart Doorhanger

Putting Fringe on a Knit Scarf

Today, I finished my latest scarf, and when I got done, I thought adding some fringe would make it look softer and even nicer. This scarf was made by knitting together these three yarns:

Ironstone Yarns ‘Hot Stuff’ #1747, Trendsetter Yarns ‘Dune’ #84, and Euro Yarns ‘Glitz’ #769.

I made the scarf on size 17 needles, and all rows were six knits. I’ve been thinking while knitting this one that it looked a little more bulky than I thought I would have turned out; I guess because of the weight of the three yarns together plus the large needles, it looked more ‘chunky’ than I had expected. When I did the bind-off of the last row, I just looked at it for a while, trying to think of what I could do to make it appear more…graceful, I guess. I decided to make lots of long fringe on both ends, and it made all the difference!

Below – my supplies were: my scarf, scissors, the yarn to make the fringe out of (I used the Euro Yarns ‘Glitz’), a crochet hook, and I used one of my knitting needles as a measurement guide for the length to cut the fringe.

Putting Fringe on a Scarf

Putting Fringe on a Scarf

Here’s the end of my scarf. I took the crochet hook down through one of the knots and out the end:

Putting Fringe on a Scarf

Then I looped a length of my fringe onto the hook (I just took my knitting needle, cut a length of yarn 2x that length, and folded that in half…the fringe can be as short or as long as you like – for this one I was thinking long would be best…you can always cut down the fringe if you think it’s too long):

Putting Fringe on a Scarf

I pulled the hook up and back through, carrying the fringe yarn:

Putting Fringe on a Scarf

Now I just pulled more of the fringe through further to make a large loop. The large loop is what you pull the ‘legs’ of the fringe through. This allows the knot to be made:

Putting Fringe on a Scarf

I pulled the ‘legs’ of the fringe through the large loop:

Putting Fringe on a Scarf

Then just pulled the legs and pushed the loop down, making a nice knot:

Putting Fringe on a Scarf

Now just add as many more pieces of fringe as you like. Although this scarf was knitted six knits per row, I added more than six sections of fringe – I stopped at fourteen on each end of the scarf. That made it look really nice and full:

Putting Fringe on a Scarf

I like it so much better now!

Felt Cupcakes with Sprinkles

There are lots of wonderful Japanese craft books (you can find many of them on eBay or Amazon’s Japan site) that show how to make all kinds of things out of craft felt…especially mascots (little animals, etc), flowers, and food items.

I’ve been wanting to try to make a felt cupcake, and as it turns out, I just did a little Google search and found instructions on Craftster. I’m making other things out of felt right now – including a cake I hope to have finished next week – but 100% of the credit for the pattern on this particular cupcake goes to the tutorial by AOI (here). It is just great!

Here’s my version, a little different because I used ‘sprinkles’ rather than the cream puff and strawberry AOI used (I really like hers too!):

Materials:
Scissors
Two colors of felt – one for the cupcake (cake part) and the other for the color icing you want.
Embroidery floss in each of the two colors (or you could even use complementary colors if you like)
Needles
Cottony stuffing
(if you make my version then you’ll also need clear jewelry string and some pretty little beads for the ‘sprinkles’)

Directions:
Cut out circles from both colors – you can use anything circular as your pattern that’s about the size you want the bottom of the cupcake to be.

Cut out a length of the cake portion equal to the circumference of the circle, and as wide as you want the cake part to be tall. (BTW, you can cut the lengths longer than the circumference, then cut them down once you get sewing in case you’re afraid of making them too short to go around, which would be a problem)

Cut out a length of the icing portion equal to the circumference of the circle, as wide as you want the icing to be, scalloping the edge so it looks pretty.

Felt Cupcake

Sew the bottom circle and the cake strip together at the bottom, then sew up the edge of the cake.

Felt Cupcake

Next, work on the icing part. Sew the icing circle and the icing scallop together, then sew the edges of the icing scallop together (just like you did with the cake).

Felt Cupcake

Here’s where I did the cupcake differently – I thought pretty little pastel beads would be pretty as ‘sprinkles’ on top. I took some clear jewelry string, made a knot in one end, then poked it through the felt (it’s strong enough to poke through the felt without a needle or anything). Just take the end through the felt, string on a bead, then poke the jewelry string back through to the back side. Just repeat that over and over until you like the amount of sprinkles and tie off with a knot on the back side again.

Felt Cupcake

Just stuff the cupcake bottom (on mine, the white part) with lots of cottony stuffing, and sew the top on, by threading the scallop edge to the cake part. Voila! I need to work on my needlework super-bad, but I am *so* happy with how they turned out.

Felt Cupcake

I Love You Banner for Valentine’s Day

Yay! It’s February! I get to decorate for not one, but two holidays this month – Valentine’s Day, and Mardi Gras, which goes up right when Valentine’s Day stuff comes down!

The first thing I’ve done for Valentine’s Day is a ‘I Love You’ banner. It’s very simple, and looks pretty nice!

Materials:
I used scrapbook paper to cut the hearts out – I used a red & white checked pattern. To stencil the letters, I used a paper from Thailand that had little strings running through it (I know there’s a name for that, but I don’t know enough about paper to know what to call it!) and isn’t quite 100% opaque. In total, use one sheet of scrapbook paper for each letter and space (so for ‘I Love You’, I needed ten pages, plus a couple extra in case I made a mistake) and half that for the letters and spaces of the contrasting color, because you can do multiple letters on one sheet of paper.

Also:
Letter Stencils (or if you’re really good, you can just do this freehand)
Stencil paint (I used white)
Stencil brush
Decorative Scissors (these have a little scallop edge. You could use a straight scissor, too, though)
Mod Podge (matte or glossy – I used matte for this)
A cheapy black foam brush to mod-podge with
Ribbon to hang the banner with
A hole punch, or improvise carefully with a pen

Directions:

First, I cut the hearts out of the checkered paper freehand.

I Love You Banner

(Quick note – I wanted to have a heart space between each of the words, so out of the solid red paper, I freehand cut a small heart shape. You can see those in the last banner pic below.)

Next, I cut rectangles of the red paper to stencil my letters on. I just laid the stencil on top of the paper:

I Love You Banner

And dabbed the stencil paint on with the brush in an up & down motion. This keeps the paint from trying to get underneath the stencil, and it has a nice look to it once you lift the stencil. It looks a little more natural than ‘painted on’:

I Love You Banner

I used my scallop scissors to cut down the original letter paper once the stenciling was done. Next, I just glued the letter paper onto the heart with some Mod-Podge, then I Mod-Podged the entire front of the heart. This makes certain that the letter stays in place:

I Love You Banner

I Love You Banner

I gave everything a few hours to dry (although it’s mostly dry in about 15 minutes), then punched a hole through the middle of the top of each heart to make a place for the ribbon. The very easiest way to do this is to fold the heart in half length-wise so you know the hole will line up. Then I just strung my ribbon through each of the holes:

I Love You Banner

And attached it to the mantle (all cleaned off, ready for more decorations!):

I Love You Banner